How to target 32bit and 64bit a .NET applications with WiX and separate MSI packages
Target 32bit and 64bit .NET applications
This post will explain how you can build msi packages using WiX for both 32bit and 64bit platforms. The goal is to create 2 different msi packages. One for 64bit systems, which will install the program in to c:\Program Files on 64bit, and another msi package that will install the program in to c:\Program Files on 32 bit systems. The .NET application itself will be compiled with CPU target Any, which results in that it will run in 64bit mode on 64bit systems and 32bit mode on 32bit systems. Of course, you could also install the 32bit msi package on 64bit systems, which will end up being installed in c:\Program Files (x86).
Pre-requisites:
Microsoft Visual Studio 2008
In my environment, I used 64bit Windows7, so I installed the 64bit version of WiX build 3.0.5419.0-x64-setup
Create a simple .NET application
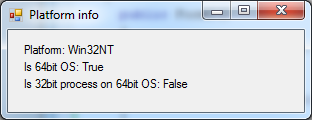
We will create a simple .NET Winforms application that will show some platform information, like this:
We will also create a WiX setup project and configure a new platform type in Visual Studio for the 64bit target.
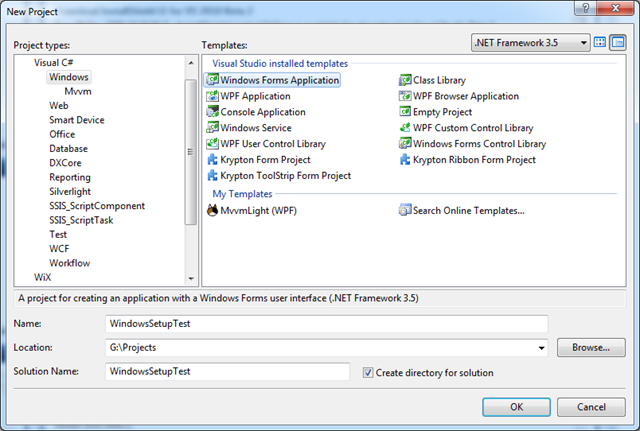
Fire up Visual Studio and create a new Windows Forms project:
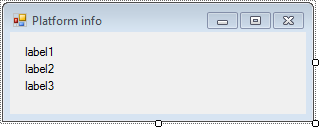
Add 3 labels to the form:
Add code in the Form Load event to fill the labels with info:
1
2
3
4
5
6
7
8
9
10
11
12
13
14
15
16
17
18
19
20
21
22
23
24
25
26
27
28
29
30
31
32
33
34
35
36
37
38
39
40
41
42
43
44
45
46
47
48
49
50
51
using System;
using System.Collections.Generic;
using System.ComponentModel;
using System.Data;
using System.Drawing;
using System.Linq;
using System.Text;
using System.Windows.Forms;
using System.Runtime.InteropServices;
using System.Diagnostics;

namespace WindowsSetupTest
{
  public partial class Form1 : Form
  {
    public Form1()
    {
      InitializeComponent();
    }

    private void Form1_Load(object sender, EventArgs e)
    {
      label1.Text = "Platform: " + System.Environment.OSVersion.Platform.ToString();
      label2.Text = "Is 64bit OS: " + Is64Bit().ToString();
      label3.Text = "Is 32bit process on 64bit OS: " + Is32BitProcessOn64BitProcessor().ToString();
    }

    [DllImport("kernel32.dll", SetLastError = true, CallingConvention = CallingConvention.Winapi)]
    [return: MarshalAs(UnmanagedType.Bool)]
    public static extern bool IsWow64Process([In] IntPtr hProcess, [Out] out bool lpSystemInfo);

    private bool Is64Bit()
    {
      if (IntPtr.Size == 8 || (IntPtr.Size == 4 && Is32BitProcessOn64BitProcessor()))
      {
        return true;
      }
      else
      {
        return false;
      }
    }

    private bool Is32BitProcessOn64BitProcessor()
    {
      bool retVal;
      IsWow64Process(Process.GetCurrentProcess().Handle, out retVal);
      return retVal;
    }
  }
}
Create a Wix project
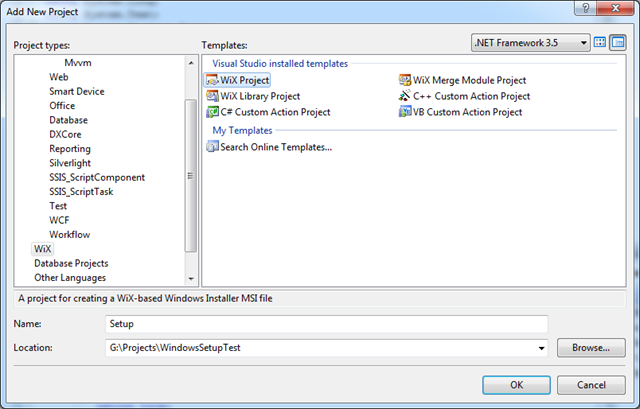
Add a new project to the solution, a WiX Setup project:
In the Product.wxs file, enter the following code:
1
2
3
4
5
6
7
8
9
10
11
12
13
14
15
16
17
18
19
20
21
22
23
24
25
26
27
28
29
30
31
32
33
34
35
36
37
38
39
40
41
42
43
44
45
46
47
48
49
50
51
52
53
54
55
56
57
58
59
60
61
62
63
64
65
66
67
68
69
70
71
72
73
74
75
76
77
78
79
80
81
<?xml version="1.0" encoding="UTF-8"?>
<Wix xmlns="http://schemas.microsoft.com/wix/2006/wi">
  <?define InstallName  = InsomniacGeek ?>
  <!-- Product name as you want it to appear in Add/Remove Programs-->
  <?if $(var.Platform) = x64 ?>
  <?define ProductName = "InsomniacGeek: Windows Setup Test (64 bit)" ?>
  <?define Win64 = "yes" ?>
  <?define PlatformProgramFilesFolder = "ProgramFiles64Folder" ?>
  <?else ?>
  <?define ProductName = "InsomniacGeek: Windows Setup Test" ?>
  <?define Win64 = "no" ?>
  <?define PlatformProgramFilesFolder = "ProgramFilesFolder" ?>
  <?endif ?>
  <Product Id="*" Name="$(var.ProductName)"  Language="1033" Version="1.0.1"  Manufacturer="InsomniacGeek"
  UpgradeCode="2551D901-A700-484b-B35C-B8E3D358FE73">
    <Package Id="CC76D2EF-6A0A-468e-89D6-6953AAEFCD06" Keywords="Installer"
    Description="$(var.ProductName)"
    InstallerVersion="200" Compressed="yes"
    Platform="$(var.Platform)"/>
    <Upgrade Id="2551D901-A700-484b-B35C-B8E3D358FE73">
    <UpgradeVersion Minimum="1.0.0" IncludeMinimum="yes" Maximum="1.0.1" Property="OLDERVERSIONBEINGUPGRADED"/>
    <UpgradeVersion Minimum="1.0.1" OnlyDetect="yes" Property="NEWERVERSIONDETECTED"/>
    </Upgrade>
    <Media Id="1" Cabinet="media1.cab" EmbedCab="yes" />
    <Condition Message="A later version of [ProductName] is already installed. Setup will now exit">
    NOT NEWERVERSIONDETECTED OR Installed
    </Condition>
    <!-- Program Files \ App \  -->
    <Directory Id="TARGETDIR" Name="SourceDir">
    <Directory Id="$(var.PlatformProgramFilesFolder)">
    <Directory Id="INSTALLLOCATION" Name="InsomniacGeek">
    <Directory Id="APPLICATIONROOTDIRECTORY" Name="Windows Setup Test"/>
    </Directory>
    </Directory>
    <!-- Start Program menu -->
    <Directory Id="ProgramMenuFolder">
    <Directory Id="ApplicationProgramsFolder" Name="InsomniacGeek Windows Setup Test"/>
    </Directory>
    </Directory>
    <!-- Files in app path -->
    <DirectoryRef Id="APPLICATIONROOTDIRECTORY">
    <Component Id='MainApp' Guid='9D181A16-5383-45b8-9D13-A0781060CA16'>
    <File Id='MainApp' Name='WindowsSetupTest.exe'
    DiskId='1' Source='..\WindowsSetupTest\bin\Debug\WindowsSetupTest.exe'/>
    </Component>
    </DirectoryRef>
    <!-- Shortcut -->
    <DirectoryRef Id="ApplicationProgramsFolder">
    <Component Id="ApplicationShortcut" Guid="953BEB35-E0BB-40ae-A1C8-F8A88E1E2529">
    <Shortcut Id="ApplicationStartMenuShortcut" Name="Windows Setup Test" Description="Application for testing"
    Target="[APPLICATIONROOTDIRECTORY]WindowsSetupTest.exe"
    WorkingDirectory="APPLICATIONROOTDIRECTORY"/>
    <Shortcut Id="UninstallProduct"
    Name="Uninstall the InsomniacGeek Windows Setup Test"
    Target="[System64Folder]msiexec.exe"
    Arguments="/x [ProductCode]"
    Directory="ApplicationProgramsFolder"
    Description="Uninstalls InsomniacGeek Windows Setup Test" />
    <RemoveFolder Id="ApplicationProgramsFolder" On="uninstall"/>
    <RegistryValue Root="HKCU" Key="Software\InsomniacGeek\WindowsSetupTest" Name="installed" Type="integer" Value="1"
    KeyPath="yes"/>
    </Component>
    </DirectoryRef>
    <!-- Features -->
    <Feature Id="Complete" Title="Windows Setup Test" Level="1"
    Description="The complete package"
    Display="expand" ConfigurableDirectory="APPLICATIONROOTDIRECTORY" >
    <Feature Id="MainProgram" Title="Program" Description="The main executable" Level="1">
    <ComponentRef Id="MainApp"/>
    <ComponentRef Id="ApplicationShortcut"/>
    </Feature>
    </Feature>
    <InstallExecuteSequence>
    <RemoveExistingProducts After="InstallInitialize"/>
    </InstallExecuteSequence>
    <!-- UI -->
    <UIRef Id="WixUI_Mondo"/>
    <UIRef Id="WixUI_ErrorProgressText" />
    <!-- End UI -->
  </Product>
</Wix>
And add references to WixUIExtension.dll and WixUtilExtension.dll.
What you will notice now is that you have 3 targets in your configuration:
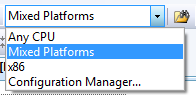
The value you choose here will be transferred to the Platform variable in WiX. Unfortunately, the 64bit option is missing, so we must create that one.
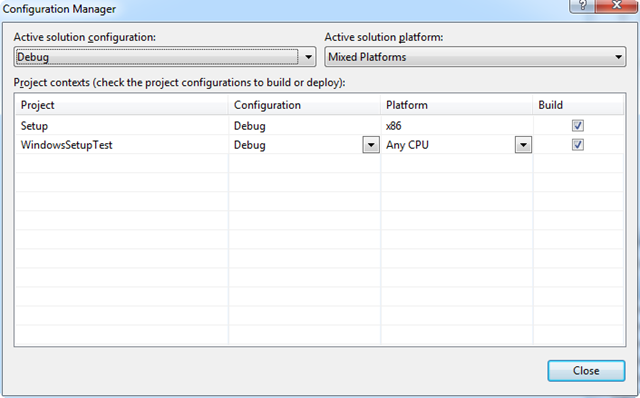
Create a x64 configuration entry
Select the Configuration Manager.
Select <New…>
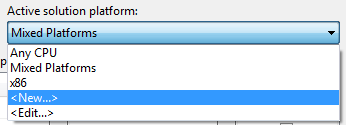

Select the x64 option and click Ok.
Building
When you now build the Wix project, the output will be created in a new x64 folder. In the Product.wxs code, we also have a title that indicates that is runs in 64bit mode:

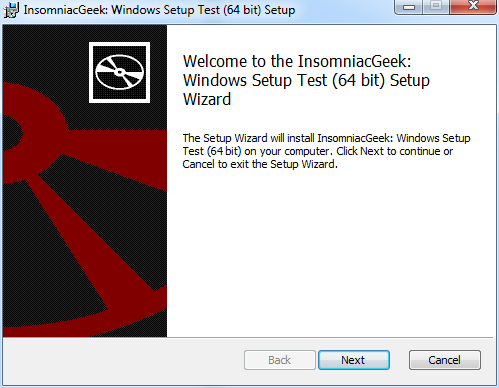
When installed, it will end up in c:\Program Files, just as we wanted.
The 32bit version of the msi is built when you select the x86 platform target

Hope this shed some light on how to deploy .NET applications for multiple targets.
Download the complete solution here.